1.1. Creating Our First App#
1.1.1. Options for Application Development in Python#
In Python, there are several options available to those interested in designing applications. Selecting the right one depends on a few different factors, from customization, deployment (where the application will sit), performance, and speed with which it can be designed. Five years ago, if one wanted to design an application in Python, one needed to use the library Tkinter. This would have a Python-based application that could run locally. The key issue with Tkinter is that it has a steep learning curve, it can only run locally (unless you are willing to package a massive and slow .exe for a simple application), and its aesthetics leaves something to be desired.
If one wanted to deploy an application on the web, there were two options available to researchers until a few years ago: flask and Django. Django has a steep learning curve but allows users to design and build entire websites that are entirely Python based. t also requires a detailed knowledge of servers in order to get an app running in the cloud effectively. Flask a simplified version of Django that does not require knowledge of server side development for deployment.
Today, there are two options that allow researchers to make applications in minutes. The first is Bokeh. Bokeh allows one to create a Python server based application or write custom JavaScript functions that allow for an application to be compiled and distributed as a single HTML file. Bokeh excels at interactive applications where a user can manipulate a graph that simultaneously changes the output of a table, for example.
For this textbook, we will learn how to design applications with Streamlit. I have chosen Streamlit for this textbook for a few reasons. First, Streamlit is relatively easy to learn. You can have your first application up and running in minutes. Second, it is well-maintained. This means that new features are added regularly. The maintainers of the library listen to their users and consistently provide features that they need. Third, Streamlit was just purchased by Snowflake which means it should continue to exist far into the future. This means that this section of the textbook will not likely go out of date quickly. Fourth, spaCy has pre-built Streamlit components, meaning you can create a spaCy-based application in seconds, not hours. Fifth, Streamlit has a large community and an active forum and Discord channel. This means that if you need to do something in Streamlit, there is likely a tutorial available; if you encounter a bug, there is likely a solution on the forum; if a solution is not on the forum, someone will help you if you ask.
All of these reasons make Streamlit the logical choice for a textbook designed for those with limited coding experience.
1.1.2. Installing Streamlit#
In order to begin designing applications with Streamlit, you first need to install it. Like all other Python libraries, you can do so by using pip. Once you execute the code below, you will install Streamlit locally.
pip install streamlit
Remember, if you are installing Streamlit via a Jupyter Notebook, you will need to add a leading !:
!pip install streamlit
The entire Streamlit application used for teaching purposes in this book can be found in the main repository under streamlit_application. To view the application while reading the book, you can run the following command:
streamlit run Home.py
If you have installed Streamlit correctly, you should see a Streamlit application in your browser. In this chapter, we will learn about all the features covered in the demonstration application. In the final section of this chapter, we will learn how to build a basic application involving real-world humanities data.
1.1.3. Creating a Home Page#
To get started with Streamlit, you only need one Python (.py) file. This will be the main page of your application. For our purposes, we will call this Home.py. Once you have created the Python file, you should import Streamlit. You can do so with the following command on the first line of the Python file.
import streamlit as st
Note that we are importing Streamlit specifically as st. This adheres to the official Streamlit documentation. One should stick to this convention as nearly all Streamlit users follow this and it is expected. It will, therefore, make your code easier to understand for others and it will also make it easier for you to debug issues that surface as your code will conform to the expected standards.
Once you have created your file, you can run the following command in your command line:
streamlit run Home.py
This will create your application on a local server (on your local computer) and populate that server in your browser. Streamlit functions by continuing to run the Python script in the background. This means that as you develop your application, you can see those developments in real time. In the top-right corner, you will see a hamburger icon (three horizontal lines). If you click this button, you will see several options. One of these is Rerun. This will let you rerun your application in real-time.
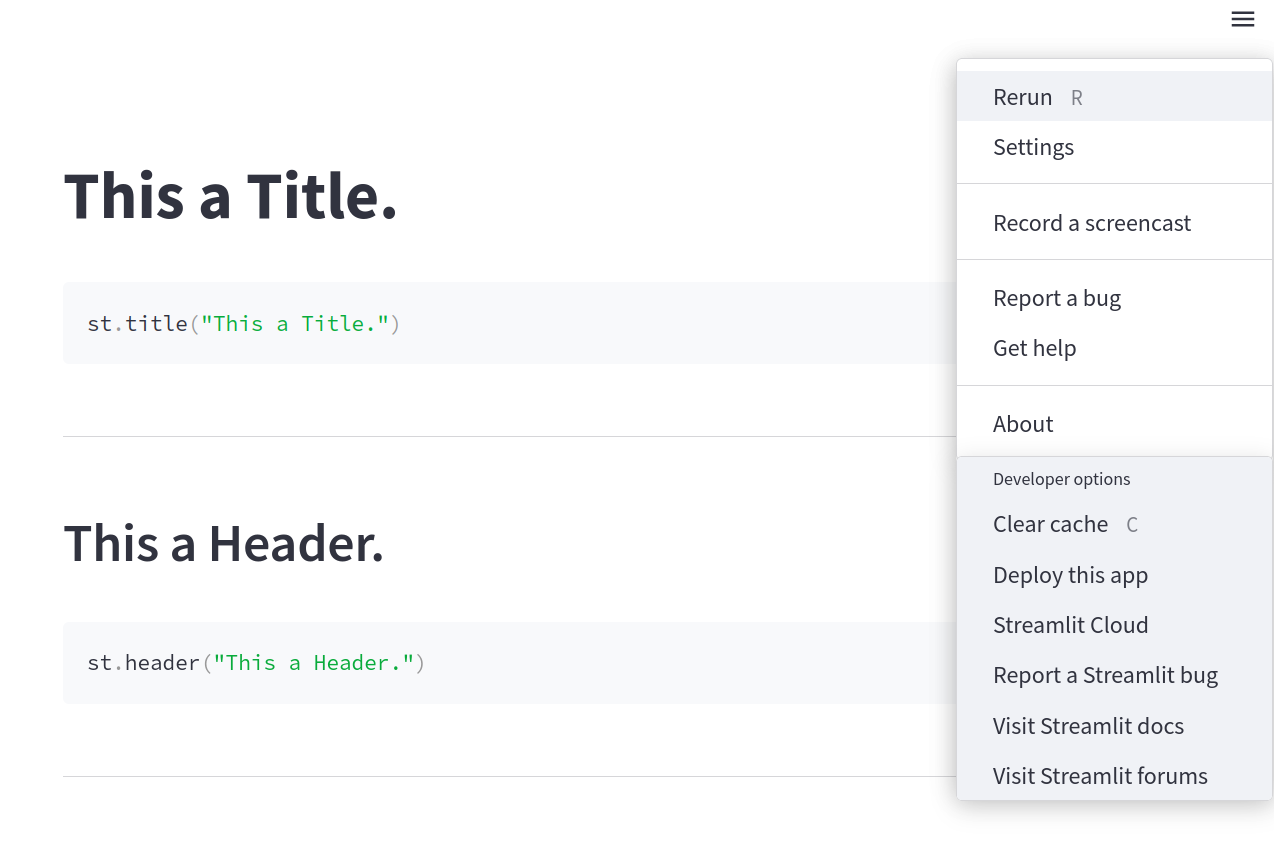
Fig. 1.19 Location of the Hamburger Icon#