2.2. Layout Design#
Controlling the layout of an application is essential from both an aesthetic and programmatic perspective. In Streamlit, we have a number of ways to control our app’s layout. Streamlit offers six different ways of controling the layout of your application through widgets. Further customization is also possible by controling the page configuration of your application as well as custom HTML. Here, we will focus on the first two; we will treat custom HTML later in this chapter.
2.2.1. Layout Widgets#
2.2.1.1. Sidebar#
The sidebar is one of the more useful layout features in Streamlit. If you are creating a multi-page app, you will have a sidebar by default. If, however, you are not using a multi-page app, you simply need to do something within the st.sidebar() widget and the sidebar will automatically appear for you. We can access the sidebar widget at any place in our Python file by writing st.sidebar.[widget]()
If we were to use the following code in our Python file, for example, we would immediately have a sidebar with a header entityled Sidebar Header.
st.sidebar.header("Sidebar Header")
The output will look like this:

Fig. 2.8 Example of a Streamlit Sidebar#
Notice on the left-hand side of the application, we have our header appear. We can populate any widget we desire into the sidebar by calling st.sidebar and then following this up with .[widget].
2.2.1.2. Columns#
We can also control the horizontal layout of our application with Streamlit’s st.columns() widget. This will take a single mandatory argument, an integer that corresponds to the number of columns you wish to create. This will return a list of column widgets that you can write to. As with the sidebar, to write to the column widget, you will use its variable name proceeded by .[widget (write, header, etc.)]
st.header("Columns")
cols = st.columns(2)
cols[0].write("Column 1")
cols[1].write("Column 2")
The output will look like this:

Fig. 2.9 Example of Streamlit Columns#
2.2.1.3. Expander#
In some cases, we will want to allow a user to view a large amount of data, but this will detract from the application and put some of the main features very low on the main page of the app. In these, cases we want a user to be able to expand certain aspects of the application when they wish and compress them when they are finished using them. Streamlit comes built with this feature in the st.expander() widget.
Once we create an expander in our application, we can then insert any other Streamlit we wish inside of it, just like columns and the sidebar. In the code below, we are creating a simple expander and then writing into it.
expander = st.expander("This is an Expander")
expander.write("This is some text in an expander...")
The output will look like this:
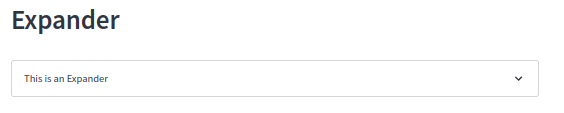
Fig. 2.10 Example off Streamlit Expander#
Notice how we see a new widget on our page. In the top-right corner, you can press the carrot and the expander will reveal the contents.
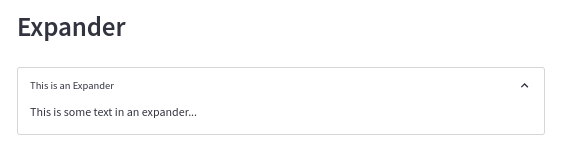
Fig. 2.11 Example of Opened Expander#
2.2.1.4. Container#
We also have the ability to create containers in our application with the st.container() widget. Remember, Streamlit widgets are populated in the order that Streamlit reads your Python file. This means that if your user performs an action and you want to display that data later in your file, then that data will populate at the bottom of your application. This is not ideal. In these scenarios, you need a way to populate a result higher in your application’s page. You can do this with the container. The container will sit in that precise position and it can then be populated at a later time.
st.header("Container")
container = st.container()
container.write("This is some text inside a container...")
The output will look like this:

Fig. 2.12 Example of a Streamlit Container#
2.2.1.5. Tabs#
In Streamlit, we can also make tabs so that a single page can host several different pages within it. This is useful if you are working with multiple datasets or collections of items that need to be displayed individually, but there is not enough space in your app to display all data sequentially. We create tabs in Streamlit via the st.tabs() widget. This will take a single argument which will be a list of tab names.
In the sample code below, we create the tabs on line 1 and then iterate over them to populate each tab with a unique message via st.write().
tabs = st.tabs(["Tab 1", "Tab 2"])
for i, tab in enumerate(tabs):
    tabs[i].write(f"Tab {i+1}")
The output will look like this:
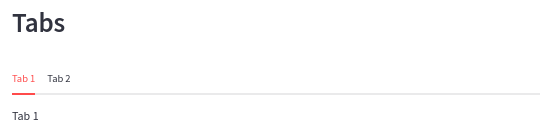
Fig. 2.13 Example of Streamlit Tabs#
2.2.1.6. Empty#
The final layout widget in Streamlit is st.empty(). This takes no arguments. It sits on the page, rather like the st.container() widget, but unlike st.container(), st.empty() will only display the most recent item sent to it. This is useful in rather niche scenarios when you want to display data individually. You can use the following code to iterate over a list of names. Note in the image below that only the last name on the list appears. This is because it was the final item in the list.
st.header("Empty")
empty = st.empty()
items = ["Tom", "Fred", "Stephanie"]
for item in items:
    empty.write(item)
The output will look like this:

Fig. 2.14 Example of Streamlit Empty#